Water Softener Installation: Tips for Installing the Drain Hose Safely
When considering water softener installation, one of the critical steps is managing the drain hose correctly. This small but essential part ensures your water softener operates efficiently and safely without causing water damage or unpleasant odors. Whether you’re a homeowner undertaking a DIY project or hiring professionals like Summers Plumbing Heating & Cooling, understanding how to install the drain hose properly can save you from costly mistakes.
Understanding the Role of the Drain Hose in Water Softener Installation
During water softener installation, the drain hose plays the crucial role of expelling wastewater generated during the regeneration cycle. This waste, which contains excess minerals and salts flushed from your water, needs to be directed away safely to avoid any backflow or leakage that can damage your home’s plumbing system.
Proper installation of the drain hose prevents back siphoning—where dirty water could be drawn back into the clean water supply, causing contamination. Therefore, along with correct placement of the water softener unit, safely securing the drain hose is vital for the long-term success of your water softening system.
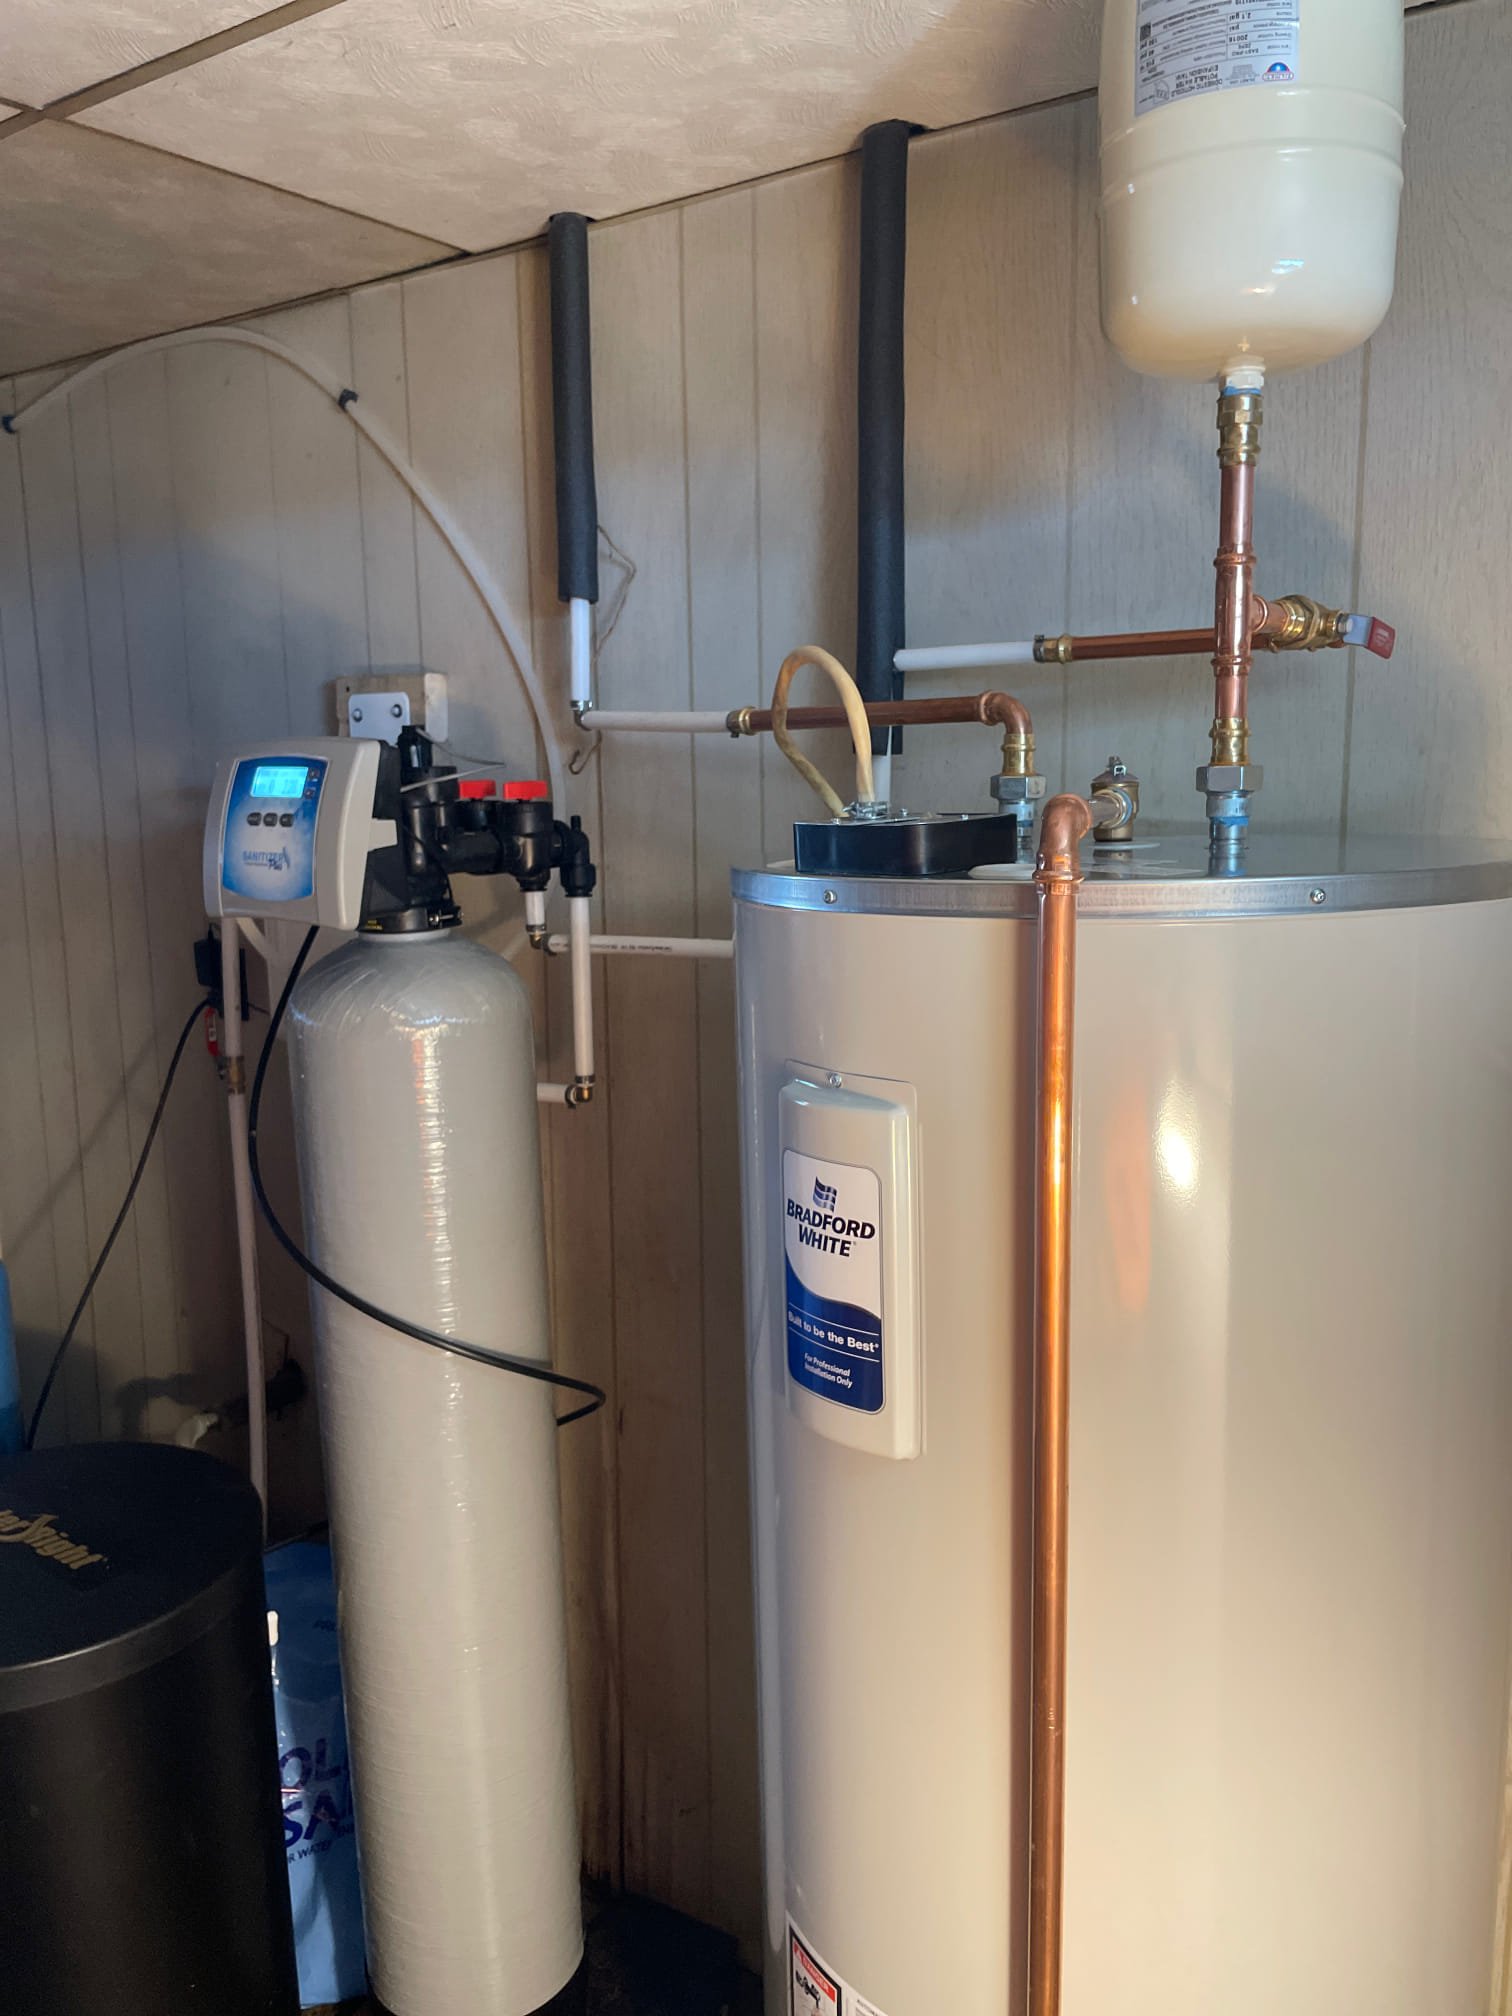
Choosing the Right Location for Water Softener Installation
Before dealing specifically with the drain hose, it’s important to select an appropriate spot for the water softener itself. Summers Plumbing Heating & Cooling advises that the system should be installed near the main water supply line where access to a drain and electrical outlet is convenient. The location should allow for easy access to the water softener for maintenance, including salt refilling and periodic inspections.
When planning your water softener installation, ensure the nearby drain—whether it’s a floor drain, utility sink, or standpipe—is easily accessible for installing the drain hose. This proximity avoids running the hose too far, which can reduce drainage efficiency and cause operational problems.
Key Tips for Installing the Drain Hose Safely
- Maintain Proper Height Above Drain
The end of the drain hose must be positioned at least 2 inches above the drain hole or standpipe to prevent back siphoning of wastewater into the softener. This air gap is a safeguard to protect potable water from contamination during the regeneration cycle. - Securely Clamp the Hose
To avoid hose displacement and leaks, fasten the drain hose firmly to the outlet on the water softener using clamps. The hose clamp ensures it remains in place and prevents accidental disconnections during water discharge. - Avoid Kinks or Sharp Bends
Carefully route the hose so that it remains free of tight bends or kinks that could obstruct flow. Smooth, gradual bends maintain steady water drainage and prevent blockages. - Use Approved Hose Materials
Use a hose made of materials compliant with local plumbing codes—usually flexible plastic tubing designed for wastewater discharge is used. Avoid makeshift materials or hoses not rated for such use to prevent leaks. - Drain Location and Distance
Keep the drain hose length within manufacturer recommendations (usually no longer than 25 feet) to ensure proper pressure for discharge. The hose should be directed downhill or horizontally towards the drain without gravity working against the flow.
These steps form an essential part of any water softener installation plan, as outlined by Summers Plumbing Heating & Cooling experts.
Integrating Drain Hose Installation with Plumbing Connections
When performing a water softener installation, the drain hose must interface seamlessly with your home’s plumbing. The hose usually connects to the control valve on the water softener. Often, manufacturers supply an air gap fitting—an important component that provides the necessary space between the hose outlet and the drain input.
After connecting the hose to the valve with appropriate nuts and washers, we direct it to the drain with the air gap maintained. This connection prevents drainage water from flowing back into your water softener or potable water line.
Since Summers Plumbing Heating & Cooling prides itself on professional installations, they ensure the drain hose setup adheres to local plumbing codes, including proper use of shutoff valves and accessible bypass valves to facilitate maintenance.
Avoiding Common Mistakes in Drain Hose Installation
Mistakes in the drain hose installation can lead to costly issues later. Here are a few common problems to avoid:
- Not providing an air gap: This negligence can cause cross-contamination if wastewater backs up.
- Improper hose placement: Plunging the hose directly into the drain without an air gap or at a height below drain level may cause siphoning.
- Using the wrong hose type: Using hoses unsuitable for drain or wastewater can lead to leaks and eventual hose failure.
- Neglecting hose clamping: Without secure clamps, the hose can detach during high-pressure drainage.
- Overly long hose runs: Excessively long or convoluted hose runs reduce drainage efficiency and can cause water to stagnate, leading to odor or clogging.
By understanding these risks during your water softener installation near me, you can take preventative action or choose professional help from companies like Summers Plumbing Heating & Cooling to get the job done right.
Testing and Final Checks After Installation
Once your water softener and drain hose are installed, a critical final step is to test the system. Turn on the main water supply and put the softener through a regeneration cycle to watch how the wastewater discharges through the hose.
Observe the drain hose for any leaks or signs of water pooling near the exit point. Confirm that the water flows freely and doesn’t back up at the drain connection. Adjust as necessary to maintain optimal flow and prevent potential water damage.
Regular inspection of the drain hose should be part of your routine maintenance schedule for your water softener.
FAQs About Water Softener Installation and Drain Hose Safety
Why is it important to have an air gap in the drain hose during water softener installation?
An air gap prevents back siphoning, which is the reverse flow of wastewater back into the water softener or the clean water supply. This is essential to avoid contamination and maintain the safety and hygiene of your drinking water.
How far can I run the drain hose from the water softener to the drain?
Ideally, the drain hose should not exceed 25 feet in length, but this can vary based on water pressure and the particular water softener model. Longer lengths can reduce drainage efficiency, causing water to back up.
Can I install the water softener drain hose myself?
Yes, if you have basic plumbing skills and follow manufacturer guidelines, you can install the drain hose yourself. However, since improper installation may cause damage, many homeowners prefer hiring professionals like Summers Plumbing Heating & Cooling for a safe and code-compliant installation.
Where should the water softener be installed relative to the home’s plumbing?
The best location is near the main water supply line, typically in a basement, garage, or utility room, close to a drain and electrical outlet. Positioning it upstream of the water heater is also recommended to protect the heater from hard water damage.
What materials should be used for the water softener drain hose?
Use durable, flexible plastic tubing rated for wastewater drainage. It should comply with local plumbing codes and be resistant to chemicals and salts used in the water softening process.
How often should I check the drain hose after installation?
Inspect the drain hose at least twice a year, especially during regular water softener maintenance. Check for leaks, kinks, or wear that could impair drainage.
By following proper guidelines for water softener installation and paying special attention to safely installing the drain hose, you can extend the life of your water softener and maintain efficient performance. If any doubt arises, companies like Summers Plumbing Heating & Cooling are ready to assist with professional, code-compliant installations that protect your home and water quality.
Summers Plumbing Heating & Cooling
2589 S Business 31, Peru, IN 46970, United States
(765) 469-8278